
Episerver (Optimizely) - How to use the Quickchannel Episerver Plugin (Episerver 9, 10, 11)
This article covers the topic of how to use the Quickchannel Plugin for Episerver.
First you need to have the plugin NuGet package installed on your Episerver, more on how to install the Quickchannel plugin for Episerver can be found in this article.
Navigate to a page you want to embed a video on.
Once you're editing a page, there are multiple ways to insert Quickchannel video, either from the asset pane within your Episerver, as a new block or by using the TinyMCE editor.
If you are running an older version of Episerver some features may not be supported, for more details check the table below.
| Plugin Version | Episerver Version | TinyMCE Editor | Content Block | Asset Pane |
|---|---|---|---|---|
| 1.x.x | 9 & 10 | Yes | Yes | No |
| 2.x.x | 11 with TinyMCE version 1 | Yes | Yes | No |
| 3.x.x | 11 with TinyMCE version 2 | Yes | Yes | No |
| 4.x.x | 11 with TinyMCE version 2 | Yes | Yes | Yes |
From the asset pane
While logged in under CMS Edit, open up the asset pane by pressing the Toggle asset pane button at the top right of the screen.
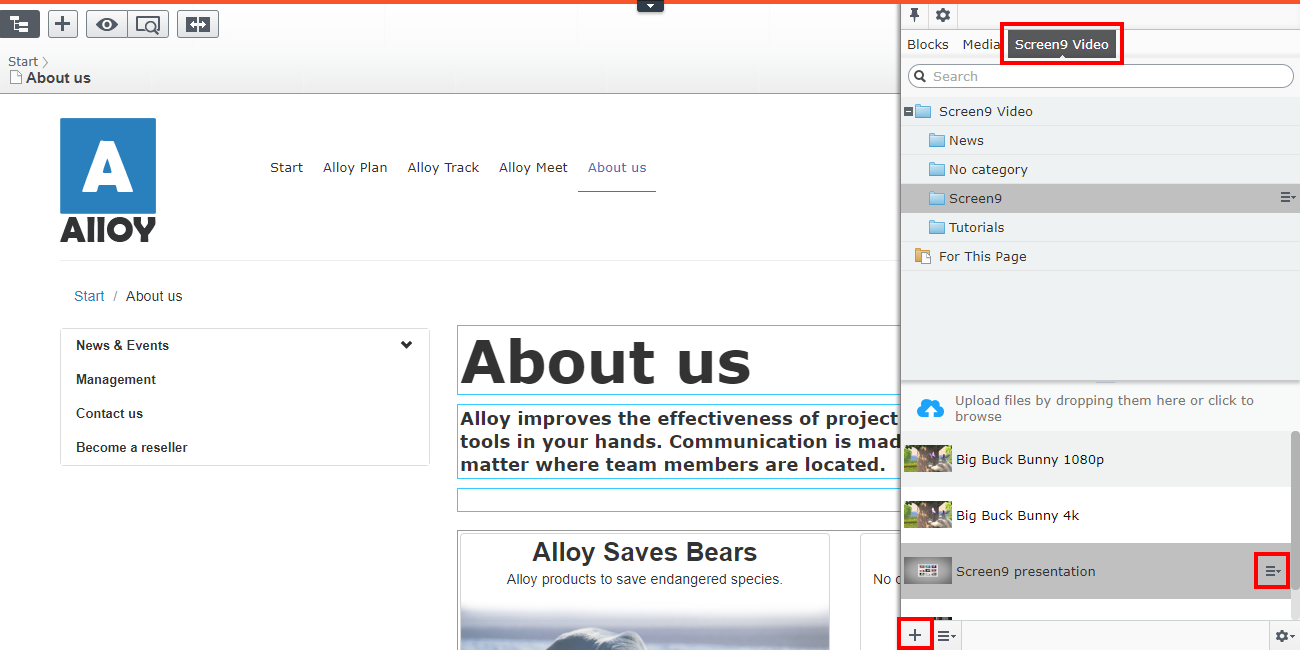
Choose the "Screen9 Video" tab of the asset pane. You will see a folder structure on the top half of the asset pane and the content of the selected folder will be displayed in the bottom half of the asset pane.
You can browse and upload videos to the connected Quickchannel account directly from the asset pane.
To upload videos, either press the plus icon at the bottom left of the asset pane or drag and drop videos directly to the asset pane. This feature can be disabled by an administrator on your Episerver. Depending on your Account settings, videos may need to be approved by a Quickchannel console user before appearing in the asset pane.
To embed videos, either drag and drop them from the asset pane to desired location on the page or create a new block and select Screen9 Media.
Note that videos uploaded via the Console won't appear immediately, they are synchronized by the Screen9 Integtation Job which is run in intervals of 30 minutes by default, this interval may be changed by an administrator on your Episerver. The synchronization can also be run manually by an administrator on your Episerver.
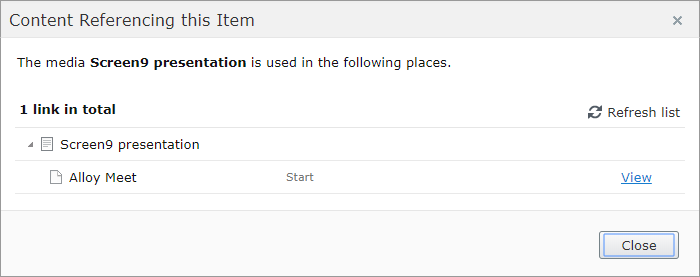
You can edit the title of a video by pressing the options icon of a media in the asset pane and choosing Edit. From the edit page you can also see which pages the video is published on.
TinyMCE Editor
In previous versions of Episerver, an admin on your Episerver site may be required to enable the Quickchannel video icon in order for it to appear in the editor toolbar, more information about how to enable the Quickchannel video icon can be found in this article.
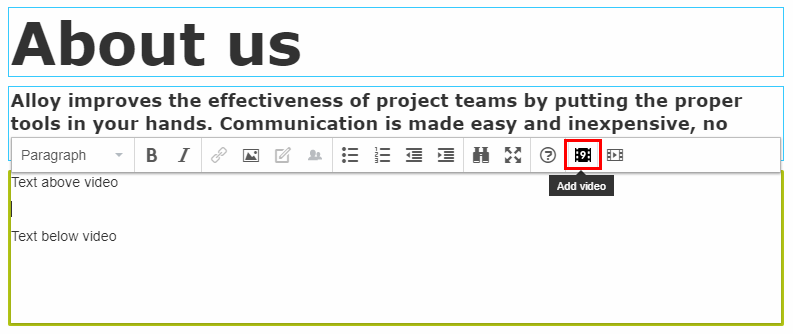
Press the Add video icon in the editor toolbar to open up the Quickchannel Console.
In the Console you can upload videos by drag-and-drop or browsing your files, record directly from your camera and schedule live events. To select a video to embed, press "Insert" next to a video in the Console to embed it on the page.
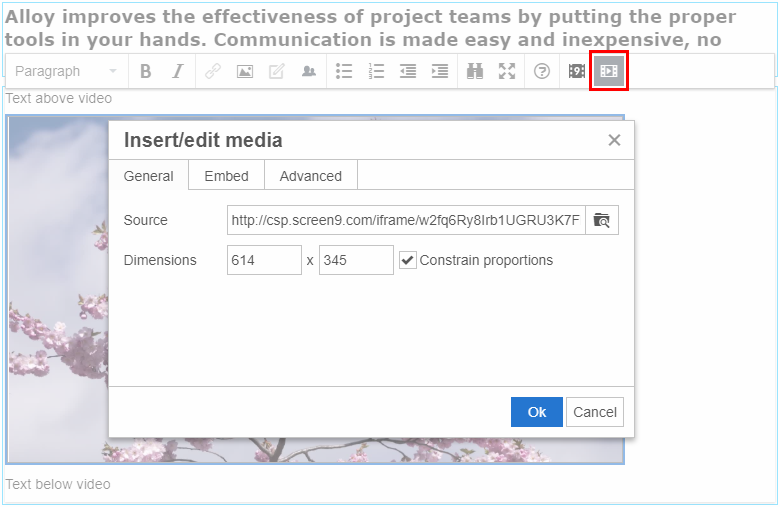
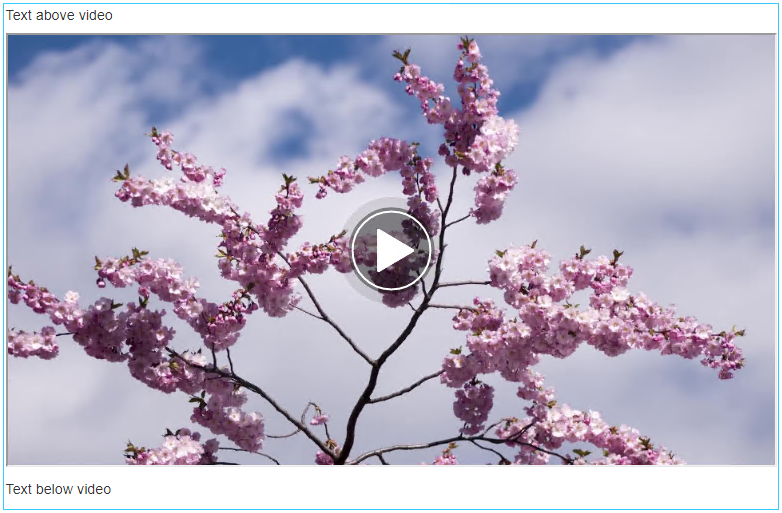
You can resize the embed by pressing the edit media button while the video is selected, selected embed is indicated by the dark blue outline as shown in image above. Pressing the edit embed icon will open op the edit media popup that you see in the image above.
New video block
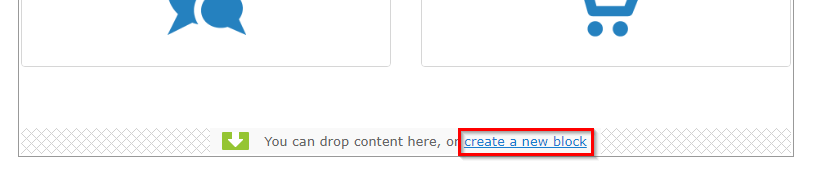
Press "create a new block":
Select the "Screen9 Media" block type:
Press "..." button to open up the Media pane:
Select a video and press "OK" button:
Finally press "Create" in the top right corner to create the new Quickchannel Video block. You should see your video embedded on the page.

Publish
You can now publish the changes to the page and view the website.
Limitations
While live events can be embedded, the integrated chat feature is not supported by this plugin.