
Adobe Premiere Pro - Installing Quickchannel extension
This article covers the topic of how to install and use use the Screen9 extension for Adobe Premiere Pro to export media from Adobe Premiere Pro to Quickchannel.
In order to use the Screen9 extension for Adobe Premiere Pro you are required to have upload privileges on a Quickchannel Account.
Installation
To install the Screen9 extension for Adobe Premiere Pro, either navigate to Adobe Exchange marketplace and search for "Screen9" or click the direct link below.
https://exchange.adobe.com/apps/cc/102753/screen9
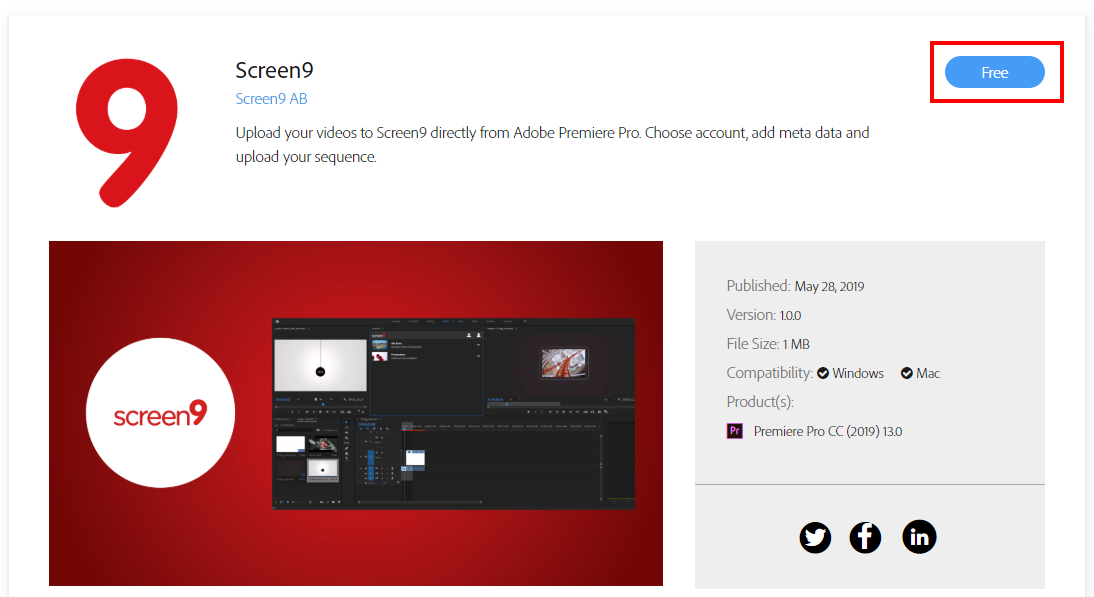
Press the button labeled "Free" marked in the image above and follow the instructions provided on the page to complete the installation.
Usage
Show the Screen9 Extension Window
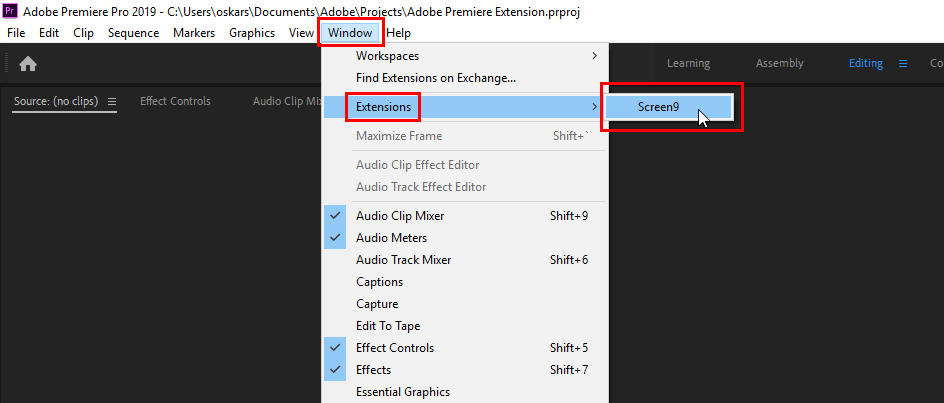
To show the Screen9 extension window in Adobe Premiere Pro, press Screen9 under Extensions in the Window drop down menu of Premiere Pro.
Login to Quickchannel
When you first open the Screen9 extension you will be prompted to log in, do so using your Quickchannel Console user credentials, or sign in with Microsoft if you account is connected with Azure Single Sing On.
Export Sequence
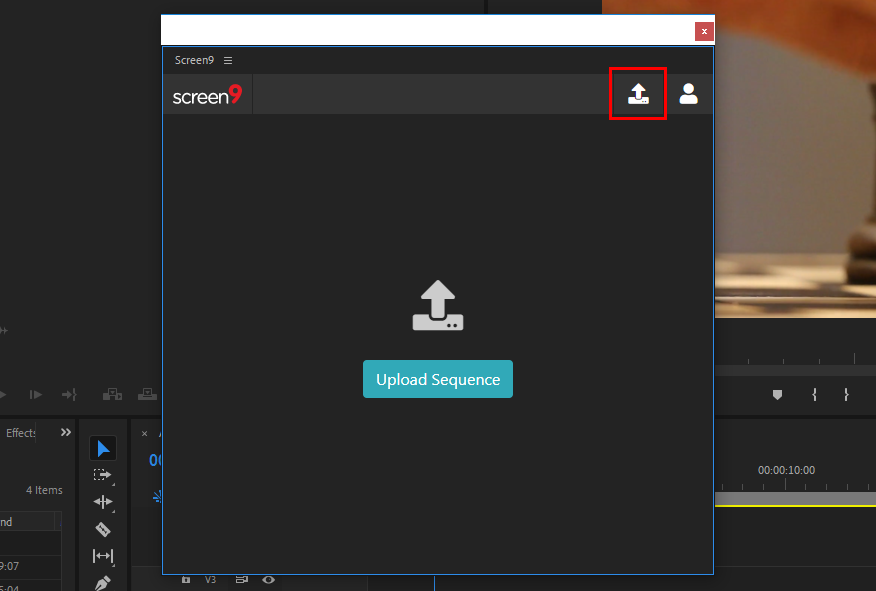
To export your sequence in Premiere Pro to your Quickchannel account press the Upload button in the top right corner of the extension window, or the "Upload Sequence" button.
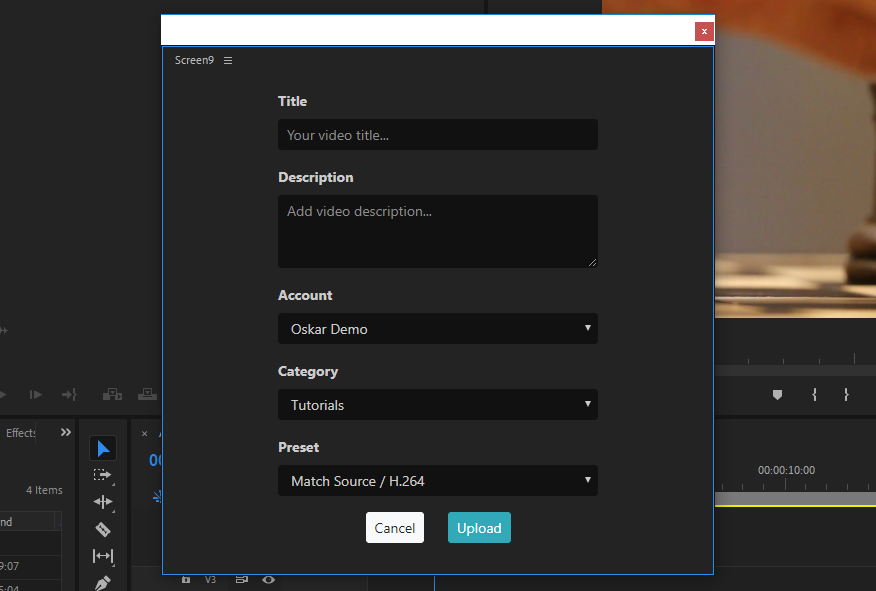
Fill in the metadata and if your Quickchannel Console user have access to multiple accounts, select which account to export the sequence to. Choose a preset of export settings and press Upload to start exporting the sequence.
After pressing Upload your sequence will be exported to the selected Quickchannel account.
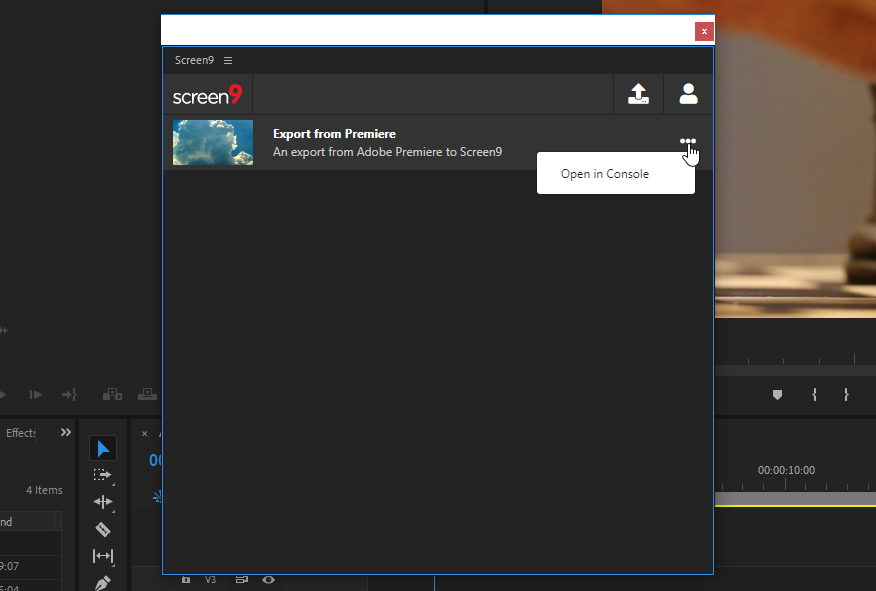
After processing, the last 10 exported videos are listed in the extension window. You can press the three dots icon on the right side of listed media to access the video in Console in order to edit its metadata.
Personalizing the interface

The Screen9 extension window can be docked anywhere in the interface of your workspace using drag and drop.